前言
本文将介绍基本的CSS选择器使用方法。
CSS选择器
CSS选择器主要可以分为两大类:
除了基于HTML标签的属性选择元素,还有一些特殊的选择器:
下面来逐一介绍。
基础标签器
元素选择器
直接选择元素标签
格式:element
示例:选择所有的<div>标签,将其文本内容设置倾斜样式
1
2
3
4
5
6
7
8
9
10
11
12
13
14
15
16
17
18
19
20
21
22
23
24
25
26
| <h2 class="title" id="title" title>面朝大海,春暖花开</h2>
<p class="author" id="author">海子</p>
<div class="para1" id="para1">
<p class="red" id="red1">从明天起,做一个幸福的人</p>
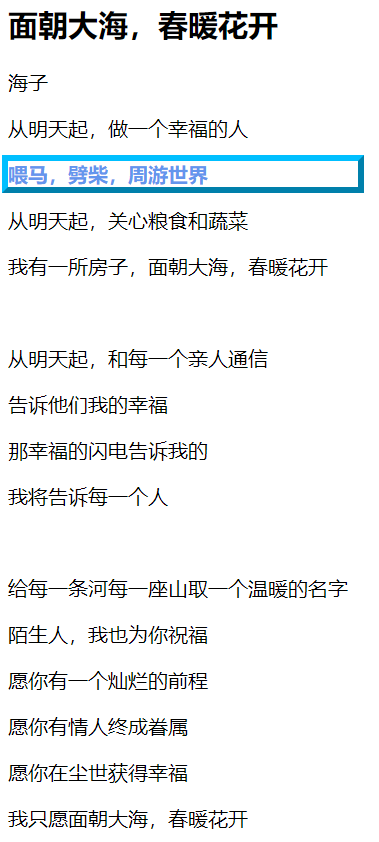
<p class="red" id="red2">喂马,劈柴,周游世界</p>
<p class="orange" id="orange1">从明天起,关心粮食和蔬菜</p>
<p class="orange" id="orange2">我有一所房子,面朝大海,春暖花开</p>
</div>
<br>
<div class="para2" id="para2">
<p class="yellow" id="yellow1">从明天起,和每一个亲人通信</p>
<p class="yellow" id="yellow2">告诉他们我的幸福</p>
<p class="green" id="green1">那幸福的闪电告诉我的</p>
<p class="green" id="green2">我将告诉每一个人</p>
</div>
<br>
<div class="para3" id="para3">
<p class="cyan" id="cyan1">给每一条河每一座山取一个温暖的名字</p>
<p class="cyan" id="cyan2">陌生人,我也为你祝福</p>
<p class="blue" id="blue1">愿你有一个灿烂的前程</p>
<p class="blue" id="blue2">愿你有情人终成眷属</p>
<p class="purple" id="purple1">愿你在尘世获得幸福</p>
<p class="purple" id="purple2">我只愿面朝大海,春暖花开</p>
</div>
|
1
2
3
| div{
font-style: italic;
}
|
效果如下:

类选择器
根据class属性选择元素
格式:.class
示例:将第三段(class=para3)的文本内容加粗
1
2
3
4
5
6
7
8
9
10
11
12
13
14
15
16
17
18
19
20
21
22
23
24
25
26
| <h2 class="title" id="title" title>面朝大海,春暖花开</h2>
<p class="author" id="author">海子</p>
<div class="para1" id="para1">
<p class="red" id="red1">从明天起,做一个幸福的人</p>
<p class="red" id="red2">喂马,劈柴,周游世界</p>
<p class="orange" id="orange1">从明天起,关心粮食和蔬菜</p>
<p class="orange" id="orange2">我有一所房子,面朝大海,春暖花开</p>
</div>
<br>
<div class="para2" id="para2">
<p class="yellow" id="yellow1">从明天起,和每一个亲人通信</p>
<p class="yellow" id="yellow2">告诉他们我的幸福</p>
<p class="green" id="green1">那幸福的闪电告诉我的</p>
<p class="green" id="green2">我将告诉每一个人</p>
</div>
<br>
<div class="para3" id="para3">
<p class="cyan" id="cyan1">给每一条河每一座山取一个温暖的名字</p>
<p class="cyan" id="cyan2">陌生人,我也为你祝福</p>
<p class="blue" id="blue1">愿你有一个灿烂的前程</p>
<p class="blue" id="blue2">愿你有情人终成眷属</p>
<p class="purple" id="purple1">愿你在尘世获得幸福</p>
<p class="purple" id="purple2">我只愿面朝大海,春暖花开</p>
</div>
|
1
2
3
| .para3{
font-weight: bolder;
}
|
效果如下:

ID选择器
根据唯一的id值选择对应的元素
格式:#id
示例:将第二段(id=para2)的文本增加下划线
1
2
3
4
5
6
7
8
9
10
11
12
13
14
15
16
17
18
19
20
21
22
23
24
25
26
| <h2 class="title" id="title" title>面朝大海,春暖花开</h2>
<p class="author" id="author">海子</p>
<div class="para1" id="para1">
<p class="red" id="red1">从明天起,做一个幸福的人</p>
<p class="red" id="red2">喂马,劈柴,周游世界</p>
<p class="orange" id="orange1">从明天起,关心粮食和蔬菜</p>
<p class="orange" id="orange2">我有一所房子,面朝大海,春暖花开</p>
</div>
<br>
<div class="para2" id="para2">
<p class="yellow" id="yellow1">从明天起,和每一个亲人通信</p>
<p class="yellow" id="yellow2">告诉他们我的幸福</p>
<p class="green" id="green1">那幸福的闪电告诉我的</p>
<p class="green" id="green2">我将告诉每一个人</p>
</div>
<br>
<div class="para3" id="para3">
<p class="cyan" id="cyan1">给每一条河每一座山取一个温暖的名字</p>
<p class="cyan" id="cyan2">陌生人,我也为你祝福</p>
<p class="blue" id="blue1">愿你有一个灿烂的前程</p>
<p class="blue" id="blue2">愿你有情人终成眷属</p>
<p class="purple" id="purple1">愿你在尘世获得幸福</p>
<p class="purple" id="purple2">我只愿面朝大海,春暖花开</p>
</div>
|
1
2
3
| #para2{
text-decoration: underline;
}
|
效果如下:

通配符选择器
选择页面中所有元素(一般不使用)
格式:*
示例:将所有内容增添下划线
1
2
3
4
5
6
7
8
9
10
11
12
13
14
15
16
17
18
19
20
21
22
23
24
25
26
| <h2 class="title" id="title" title>面朝大海,春暖花开</h2>
<p class="author" id="author">海子</p>
<div class="para1" id="para1">
<p class="red" id="red1">从明天起,做一个幸福的人</p>
<p class="red" id="red2">喂马,劈柴,周游世界</p>
<p class="orange" id="orange1">从明天起,关心粮食和蔬菜</p>
<p class="orange" id="orange2">我有一所房子,面朝大海,春暖花开</p>
</div>
<br>
<div class="para2" id="para2">
<p class="yellow" id="yellow1">从明天起,和每一个亲人通信</p>
<p class="yellow" id="yellow2">告诉他们我的幸福</p>
<p class="green" id="green1">那幸福的闪电告诉我的</p>
<p class="green" id="green2">我将告诉每一个人</p>
</div>
<br>
<div class="para3" id="para3">
<p class="cyan" id="cyan1">给每一条河每一座山取一个温暖的名字</p>
<p class="cyan" id="cyan2">陌生人,我也为你祝福</p>
<p class="blue" id="blue1">愿你有一个灿烂的前程</p>
<p class="blue" id="blue2">愿你有情人终成眷属</p>
<p class="purple" id="purple1">愿你在尘世获得幸福</p>
<p class="purple" id="purple2">我只愿面朝大海,春暖花开</p>
</div>
|
1
2
3
| *{
text-decoration: underline;
}
|
效果如下:

属性选择器
可以根据元素的属性以及属性值来选择元素
格式:[attribute]
示例:将带有title属性的元素内容添加橙色阴影
1
2
3
4
5
6
7
8
9
10
11
12
13
14
15
16
17
18
19
20
21
22
23
24
25
26
| <h2 class="title" id="title" title>面朝大海,春暖花开</h2>
<p class="author" id="author">海子</p>
<div class="para1" id="para1">
<p class="red" id="red1">从明天起,做一个幸福的人</p>
<p class="red" id="red2">喂马,劈柴,周游世界</p>
<p class="orange" id="orange1">从明天起,关心粮食和蔬菜</p>
<p class="orange" id="orange2">我有一所房子,面朝大海,春暖花开</p>
</div>
<br>
<div class="para2" id="para2">
<p class="yellow" id="yellow1">从明天起,和每一个亲人通信</p>
<p class="yellow" id="yellow2">告诉他们我的幸福</p>
<p class="green" id="green1">那幸福的闪电告诉我的</p>
<p class="green" id="green2">我将告诉每一个人</p>
</div>
<br>
<div class="para3" id="para3">
<p class="cyan" id="cyan1">给每一条河每一座山取一个温暖的名字</p>
<p class="cyan" id="cyan2">陌生人,我也为你祝福</p>
<p class="blue" id="blue1">愿你有一个灿烂的前程</p>
<p class="blue" id="blue2">愿你有情人终成眷属</p>
<p class="purple" id="purple1">愿你在尘世获得幸福</p>
<p class="purple" id="purple2">我只愿面朝大海,春暖花开</p>
</div>
|
1
2
3
| [title]{
text-shadow: 0.1em 0.1em 0.2em darkorange;
}
|
效果如下:
格式:[attribute=value]
示例:将第一段(class属性值为para1)的文本内容添加蓝色阴影
1
2
3
4
5
6
7
8
9
10
11
12
13
14
15
16
17
18
19
20
21
22
23
24
25
26
| <h2 class="title" id="title" title>面朝大海,春暖花开</h2>
<p class="author" id="author">海子</p>
<div class="para1" id="para1">
<p class="red" id="red1">从明天起,做一个幸福的人</p>
<p class="red" id="red2">喂马,劈柴,周游世界</p>
<p class="orange" id="orange1">从明天起,关心粮食和蔬菜</p>
<p class="orange" id="orange2">我有一所房子,面朝大海,春暖花开</p>
</div>
<br>
<div class="para2" id="para2">
<p class="yellow" id="yellow1">从明天起,和每一个亲人通信</p>
<p class="yellow" id="yellow2">告诉他们我的幸福</p>
<p class="green" id="green1">那幸福的闪电告诉我的</p>
<p class="green" id="green2">我将告诉每一个人</p>
</div>
<br>
<div class="para3" id="para3">
<p class="cyan" id="cyan1">给每一条河每一座山取一个温暖的名字</p>
<p class="cyan" id="cyan2">陌生人,我也为你祝福</p>
<p class="blue" id="blue1">愿你有一个灿烂的前程</p>
<p class="blue" id="blue2">愿你有情人终成眷属</p>
<p class="purple" id="purple1">愿你在尘世获得幸福</p>
<p class="purple" id="purple2">我只愿面朝大海,春暖花开</p>
</div>
|
1
2
3
| [class=para1]{
text-shadow: 0.1em 0.1em 0.2em blue;
}
|
效果如下:
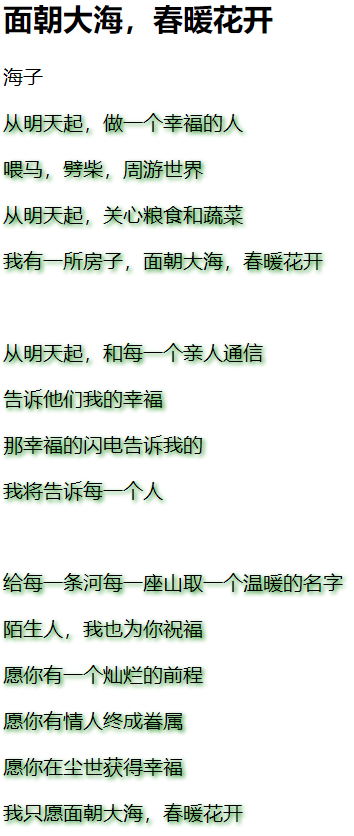
格式:[attribute*=value]
示例:将class属性包含para值的元素内容添加绿色阴影
1
2
3
4
5
6
7
8
9
10
11
12
13
14
15
16
17
18
19
20
21
22
23
24
25
26
| <h2 class="title" id="title" title>面朝大海,春暖花开</h2>
<p class="author" id="author">海子</p>
<div class="para1" id="para1">
<p class="red" id="red1">从明天起,做一个幸福的人</p>
<p class="red" id="red2">喂马,劈柴,周游世界</p>
<p class="orange" id="orange1">从明天起,关心粮食和蔬菜</p>
<p class="orange" id="orange2">我有一所房子,面朝大海,春暖花开</p>
</div>
<br>
<div class="para2" id="para2">
<p class="yellow" id="yellow1">从明天起,和每一个亲人通信</p>
<p class="yellow" id="yellow2">告诉他们我的幸福</p>
<p class="green" id="green1">那幸福的闪电告诉我的</p>
<p class="green" id="green2">我将告诉每一个人</p>
</div>
<br>
<div class="para3" id="para3">
<p class="cyan" id="cyan1">给每一条河每一座山取一个温暖的名字</p>
<p class="cyan" id="cyan2">陌生人,我也为你祝福</p>
<p class="blue" id="blue1">愿你有一个灿烂的前程</p>
<p class="blue" id="blue2">愿你有情人终成眷属</p>
<p class="purple" id="purple1">愿你在尘世获得幸福</p>
<p class="purple" id="purple2">我只愿面朝大海,春暖花开</p>
</div>
|
1
2
3
| [class*=para]{
text-shadow: 0.1em 0.1em 0.2em green;
}
|
效果如下:
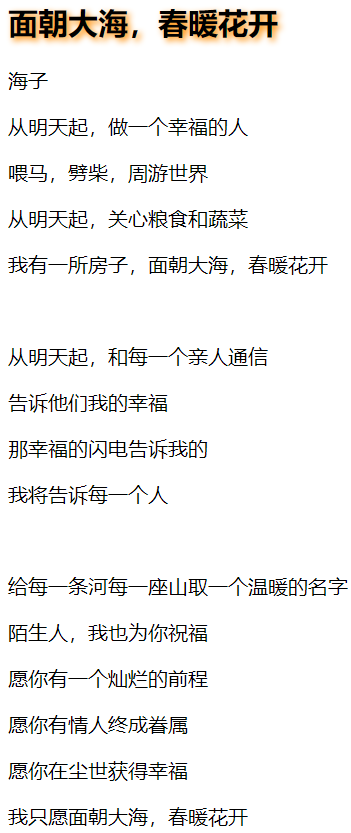
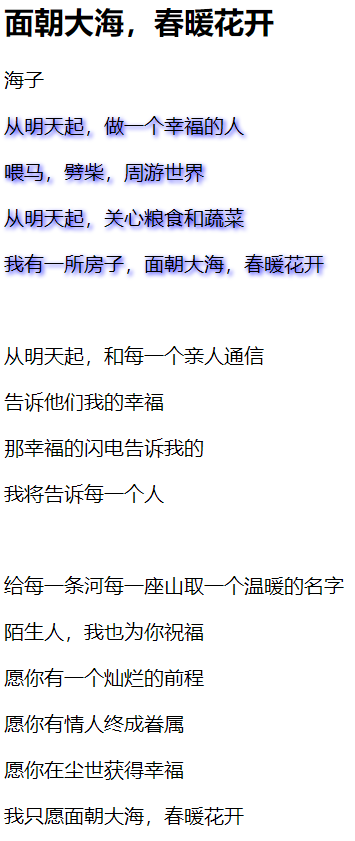
格式:[attribute^=value]
示例:将id属性以pa开头的元素内容添加黄色阴影
1
2
3
4
5
6
7
8
9
10
11
12
13
14
15
16
17
18
19
20
21
22
23
24
25
26
| <h2 class="title" id="title" title>面朝大海,春暖花开</h2>
<p class="author" id="author">海子</p>
<div class="para1" id="para1">
<p class="red" id="red1">从明天起,做一个幸福的人</p>
<p class="red" id="red2">喂马,劈柴,周游世界</p>
<p class="orange" id="orange1">从明天起,关心粮食和蔬菜</p>
<p class="orange" id="orange2">我有一所房子,面朝大海,春暖花开</p>
</div>
<br>
<div class="para2" id="para2">
<p class="yellow" id="yellow1">从明天起,和每一个亲人通信</p>
<p class="yellow" id="yellow2">告诉他们我的幸福</p>
<p class="green" id="green1">那幸福的闪电告诉我的</p>
<p class="green" id="green2">我将告诉每一个人</p>
</div>
<br>
<div class="para3" id="para3">
<p class="cyan" id="cyan1">给每一条河每一座山取一个温暖的名字</p>
<p class="cyan" id="cyan2">陌生人,我也为你祝福</p>
<p class="blue" id="blue1">愿你有一个灿烂的前程</p>
<p class="blue" id="blue2">愿你有情人终成眷属</p>
<p class="purple" id="purple1">愿你在尘世获得幸福</p>
<p class="purple" id="purple2">我只愿面朝大海,春暖花开</p>
</div>
|
1
2
3
| [id^=pa]{
text-shadow: 0.1em 0.1em 0.2em yellow;
}
|
效果如下:
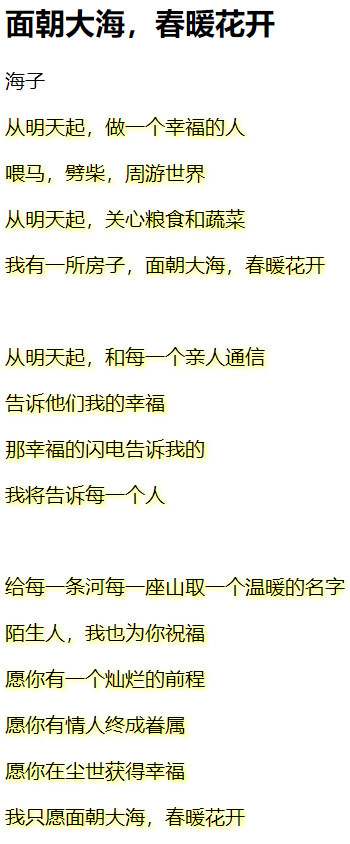
格式:[attribute$=value]
示例:将id以le结尾的元素内容添加绿色边框
1
2
3
4
5
6
7
8
9
10
11
12
13
14
15
16
17
18
19
20
21
22
23
24
25
26
| <h2 class="title" id="title" title>面朝大海,春暖花开</h2>
<p class="author" id="author">海子</p>
<div class="para1" id="para1">
<p class="red" id="red1">从明天起,做一个幸福的人</p>
<p class="red" id="red2">喂马,劈柴,周游世界</p>
<p class="orange" id="orange1">从明天起,关心粮食和蔬菜</p>
<p class="orange" id="orange2">我有一所房子,面朝大海,春暖花开</p>
</div>
<br>
<div class="para2" id="para2">
<p class="yellow" id="yellow1">从明天起,和每一个亲人通信</p>
<p class="yellow" id="yellow2">告诉他们我的幸福</p>
<p class="green" id="green1">那幸福的闪电告诉我的</p>
<p class="green" id="green2">我将告诉每一个人</p>
</div>
<br>
<div class="para3" id="para3">
<p class="cyan" id="cyan1">给每一条河每一座山取一个温暖的名字</p>
<p class="cyan" id="cyan2">陌生人,我也为你祝福</p>
<p class="blue" id="blue1">愿你有一个灿烂的前程</p>
<p class="blue" id="blue2">愿你有情人终成眷属</p>
<p class="purple" id="purple1">愿你在尘世获得幸福</p>
<p class="purple" id="purple2">我只愿面朝大海,春暖花开</p>
</div>
|
1
2
3
4
| [id$=le]{
width: 220px;
outline: yellowgreen outset 5px;
}
|
效果如下:

复合选择器
复合选择器是由两个或多个基础选择器,通过不同的方式组合而成的。
交集选择器
又称“标签指定式选择器”(即…又…)。由两个选择器构成,其中第一个为标记选择器,第二个为class选择器或id选择器。
注意:两个选择器之间不能有空格
格式:
示例:选择<p>标签下class属性值为purple的元素,将其文本样式设置为紫色、加粗
1
2
3
4
5
6
7
8
9
10
11
12
13
14
15
16
17
18
19
20
21
22
23
24
25
26
| <h2 class="title" id="title" title>面朝大海,春暖花开</h2>
<p class="author" id="author">海子</p>
<div class="para1" id="para1">
<p class="red" id="red1">从明天起,做一个幸福的人</p>
<p class="red" id="red2">喂马,劈柴,周游世界</p>
<p class="orange" id="orange1">从明天起,关心粮食和蔬菜</p>
<p class="orange" id="orange2">我有一所房子,面朝大海,春暖花开</p>
</div>
<br>
<div class="para2" id="para2">
<p class="yellow" id="yellow1">从明天起,和每一个亲人通信</p>
<p class="yellow" id="yellow2">告诉他们我的幸福</p>
<p class="green" id="green1">那幸福的闪电告诉我的</p>
<p class="green" id="green2">我将告诉每一个人</p>
</div>
<br>
<div class="para3" id="para3">
<p class="cyan" id="cyan1">给每一条河每一座山取一个温暖的名字</p>
<p class="cyan" id="cyan2">陌生人,我也为你祝福</p>
<p class="blue" id="blue1">愿你有一个灿烂的前程</p>
<p class="blue" id="blue2">愿你有情人终成眷属</p>
<p class="purple" id="purple1">愿你在尘世获得幸福</p>
<p class="purple" id="purple2">我只愿面朝大海,春暖花开</p>
</div>
|
1
2
3
4
| p.purple{
color: purple;
font-weight: bolder;
}
|
效果如下:

并集选择器
由各个选择器通过逗号,连接而成。
任何形式的选择器都可以作为并集选择器的一部分
格式:
选择器1,选择器2,...
示例:选择<h2>标签和class属性值为orange的元素,将其文本样式设置为橙色、加粗
1
2
3
4
5
6
7
8
9
10
11
12
13
14
15
16
17
18
19
20
21
22
23
24
25
26
| <h2 class="title" id="title" title>面朝大海,春暖花开</h2>
<p class="author" id="author">海子</p>
<div class="para1" id="para1">
<p class="red" id="red1">从明天起,做一个幸福的人</p>
<p class="red" id="red2">喂马,劈柴,周游世界</p>
<p class="orange" id="orange1">从明天起,关心粮食和蔬菜</p>
<p class="orange" id="orange2">我有一所房子,面朝大海,春暖花开</p>
</div>
<br>
<div class="para2" id="para2">
<p class="yellow" id="yellow1">从明天起,和每一个亲人通信</p>
<p class="yellow" id="yellow2">告诉他们我的幸福</p>
<p class="green" id="green1">那幸福的闪电告诉我的</p>
<p class="green" id="green2">我将告诉每一个人</p>
</div>
<br>
<div class="para3" id="para3">
<p class="cyan" id="cyan1">给每一条河每一座山取一个温暖的名字</p>
<p class="cyan" id="cyan2">陌生人,我也为你祝福</p>
<p class="blue" id="blue1">愿你有一个灿烂的前程</p>
<p class="blue" id="blue2">愿你有情人终成眷属</p>
<p class="purple" id="purple1">愿你在尘世获得幸福</p>
<p class="purple" id="purple2">我只愿面朝大海,春暖花开</p>
</div>
|
1
2
3
4
| h2,[class="orange"]{
color: orange;
font-weight: bolder;
}
|
效果如下:

后代、儿子、兄弟选择器
又称为“包含选择器”,可以选择某元素后代的元素
格式:
element element
示例:选择<div>标签下class属性为blue的元素,将其文本样式设置为蓝色、加粗
1
2
3
4
5
6
7
8
9
10
11
12
13
14
15
16
17
18
19
20
21
22
23
24
25
26
| <h2 class="title" id="title" title>面朝大海,春暖花开</h2>
<p class="author" id="author">海子</p>
<div class="para1" id="para1">
<p class="red" id="red1">从明天起,做一个幸福的人</p>
<p class="red" id="red2">喂马,劈柴,周游世界</p>
<p class="orange" id="orange1">从明天起,关心粮食和蔬菜</p>
<p class="orange" id="orange2">我有一所房子,面朝大海,春暖花开</p>
</div>
<br>
<div class="para2" id="para2">
<p class="yellow" id="yellow1">从明天起,和每一个亲人通信</p>
<p class="yellow" id="yellow2">告诉他们我的幸福</p>
<p class="green" id="green1">那幸福的闪电告诉我的</p>
<p class="green" id="green2">我将告诉每一个人</p>
</div>
<br>
<div class="para3" id="para3">
<p class="cyan" id="cyan1">给每一条河每一座山取一个温暖的名字</p>
<p class="cyan" id="cyan2">陌生人,我也为你祝福</p>
<p class="blue" id="blue1">愿你有一个灿烂的前程</p>
<p class="blue" id="blue2">愿你有情人终成眷属</p>
<p class="purple" id="purple1">愿你在尘世获得幸福</p>
<p class="purple" id="purple2">我只愿面朝大海,春暖花开</p>
</div>
|
1
2
3
4
| div [class="blue"]{
color: blue;
font-weight: bolder;
}
|
效果如下:

只选择某个元素的子元素,而非所有后代元素
格式:
element>element
示例:选择<div>标签下所有的<p>元素,将其文本样式设置为红色、加粗,并添加粉色边框
1
2
3
4
5
6
7
8
9
10
11
12
13
14
15
16
17
18
19
20
21
22
23
24
25
26
27
28
29
30
| <h2 class="title" id="title" title>面朝大海,春暖花开</h2>
<p class="author" id="author">海子</p>
<div class="para1" id="para1">
<p class="red" id="red1">从明天起,做一个幸福的人</p>
<p class="red" id="red2">喂马,劈柴,周游世界</p>
<p class="orange" id="orange1">从明天起,关心粮食和蔬菜</p>
<p class="orange" id="orange2">我有一所房子,面朝大海,春暖花开</p>
</div>
<br>
<div class="para2" id="para2">
<em>
<p class="yellow" id="yellow1">从明天起,和每一个亲人通信</p>
<p class="yellow" id="yellow2">告诉他们我的幸福</p>
<p class="green" id="green1">那幸福的闪电告诉我的</p>
<p class="green" id="green2">我将告诉每一个人</p>
</em>
</div>
<br>
<div class="para3" id="para3">
<em>
<p class="cyan" id="cyan1">给每一条河每一座山取一个温暖的名字</p>
<p class="cyan" id="cyan2">陌生人,我也为你祝福</p>
<p class="blue" id="blue1">愿你有一个灿烂的前程</p>
<p class="blue" id="blue2">愿你有情人终成眷属</p>
<p class="purple" id="purple1">愿你在尘世获得幸福</p>
<p class="purple" id="purple2">我只愿面朝大海,春暖花开</p>
</em>
</div>
|
注意:这里第二、三段文本被<em>标签包裹,而非直接在<div>标签下
1
2
3
4
5
6
| div>p{
width: 280px;
color: red;
font-weight: bolder;
outline: hotpink outset 5px;
}
|
效果如下:

选择紧邻在一个元素之后的另一个元素(二者必须拥有相同的父元素)
格式:
element+element
示例:选择紧跟在id值为red1标签后的第一个<p>标签,将其文本样式设置为蓝色、加粗,并添加蓝色边框
1
2
3
4
5
6
7
8
9
10
11
12
13
14
15
16
17
18
19
20
21
22
23
24
25
26
| <h2 class="title" id="title" title>面朝大海,春暖花开</h2>
<p class="author" id="author">海子</p>
<div class="para1" id="para1">
<p class="red" id="red1">从明天起,做一个幸福的人</p>
<p class="red" id="red2">喂马,劈柴,周游世界</p>
<p class="orange" id="orange1">从明天起,关心粮食和蔬菜</p>
<p class="orange" id="orange2">我有一所房子,面朝大海,春暖花开</p>
</div>
<br>
<div class="para2" id="para2">
<p class="yellow" id="yellow1">从明天起,和每一个亲人通信</p>
<p class="yellow" id="yellow2">告诉他们我的幸福</p>
<p class="green" id="green1">那幸福的闪电告诉我的</p>
<p class="green" id="green2">我将告诉每一个人</p>
</div>
<br>
<div class="para3" id="para3">
<p class="cyan" id="cyan1">给每一条河每一座山取一个温暖的名字</p>
<p class="cyan" id="cyan2">陌生人,我也为你祝福</p>
<p class="blue" id="blue1">愿你有一个灿烂的前程</p>
<p class="blue" id="blue2">愿你有情人终成眷属</p>
<p class="purple" id="purple1">愿你在尘世获得幸福</p>
<p class="purple" id="purple2">我只愿面朝大海,春暖花开</p>
</div>
|
1
2
3
4
5
6
| [id="red1"]+p{
width: 280px;
color: cornflowerblue;
font-weight: bolder;
outline: deepskyblue outset 5px;
}
|
效果如下:
选择一个元素之后所有指定的同级元素
格式:
element~element
示例:选择紧跟在id值为red1之后所有的<p>标签,将其文本样式设置为橙色、加粗,并添加绿色边框
1
2
3
4
5
6
7
8
9
10
11
12
13
14
15
16
17
18
19
20
21
22
23
24
25
26
| <h2 class="title" id="title" title>面朝大海,春暖花开</h2>
<p class="author" id="author">海子</p>
<div class="para1" id="para1">
<p class="red" id="red1">从明天起,做一个幸福的人</p>
<p class="red" id="red2">喂马,劈柴,周游世界</p>
<p class="orange" id="orange1">从明天起,关心粮食和蔬菜</p>
<p class="orange" id="orange2">我有一所房子,面朝大海,春暖花开</p>
</div>
<br>
<div class="para2" id="para2">
<p class="yellow" id="yellow1">从明天起,和每一个亲人通信</p>
<p class="yellow" id="yellow2">告诉他们我的幸福</p>
<p class="green" id="green1">那幸福的闪电告诉我的</p>
<p class="green" id="green2">我将告诉每一个人</p>
</div>
<br>
<div class="para3" id="para3">
<p class="cyan" id="cyan1">给每一条河每一座山取一个温暖的名字</p>
<p class="cyan" id="cyan2">陌生人,我也为你祝福</p>
<p class="blue" id="blue1">愿你有一个灿烂的前程</p>
<p class="blue" id="blue2">愿你有情人终成眷属</p>
<p class="purple" id="purple1">愿你在尘世获得幸福</p>
<p class="purple" id="purple2">我只愿面朝大海,春暖花开</p>
</div>
|
1
2
3
4
5
6
| [id="red1"]~p{
width: 280px;
color: orange;
font-weight: bolder;
outline: forestgreen outset 5px;
}
|
效果如下:

伪类选择器
伪类选择器可以根据元素的状态或者元素的某种结构来选择元素。
根据上述介绍可以将伪类选择器分为两类:
下面来逐一介绍。
UI伪类选择器
- link:链接等待用户点击的状态
- visited:用户此前已经点击过链接
- hover:用户鼠标悬停在链接上
- focus:链接拥有焦点的时候
- active:链接正在被点击(鼠标在元素上按下,还没有被释放)
注意:如果链接拥有上述多种状态设置时,必须按照“LVHFA”的顺序定义选择器,否则会失效。
示例:以百度链接为例实现如下效果:
- 当未访问过时字体为蓝色
- 当鼠标悬停在链接上方时为灰色
- 当鼠标点击不释放时为红色
- 当链接拥有焦点时为黄色
- 当链接访问过时为紫色
1
2
3
| <div>
<a href="https://www.baidu.com/">百度一下,你就知道</a>
</div>
|
1
2
3
4
5
6
7
8
9
10
11
12
13
14
15
| a:link{
color: #2440b3;
}
a:visited{
color: #771cb2;
}
a:hover{
color: darkgrey;
}
a:focus{
color: gold;
}
a:active{
color: #ff0000;
}
|
效果如下:
一个元素在获得焦点时选择该元素
格式:
e:focus(其中e代表html中的任意元素)
示例:构建一个表单,当输入框获取到焦点时,样式改为:字体橙色、加粗,并添加绿色边框
1
2
3
4
5
| <form action="#">
用户名:<input type="text" name="username">
密码:<input type="password" name="password">
<input type="submit" value="提交">
</form>
|
1
2
3
4
5
| input:focus{
color: orange;
font-weight: bolder;
outline: forestgreen outset 5px;
}
|
效果如下:

这里要涉及锚点。当点击锚点链接时,选中被链接的元素。
格式:
#xx:target
示例:点击锚点链接,被链接的文本样式加粗
1
2
3
4
5
6
7
8
9
10
11
12
13
14
15
16
17
18
19
20
21
22
23
24
25
26
27
28
29
30
31
32
| <div>
<h2 class="title" id="title" title>面朝大海,春暖花开</h2>

  <p class="author" id="author">海子</p>

  <div class="para1" id="para1">
    <p class="red" id="red1">从明天起,做一个幸福的人</p>
    <p class="red" id="red2">喂马,劈柴,周游世界</p>
    <p class="orange" id="orange1">从明天起,关心粮食和蔬菜</p>
    <p class="orange" id="orange2">我有一所房子,面朝大海,春暖花开</p>
  </div>
  <br>
  <div class="para2" id="para2">
    <p class="yellow" id="yellow1">从明天起,和每一个亲人通信</p>
    <p class="yellow" id="yellow2">告诉他们我的幸福</p>
    <p class="green" id="green1">那幸福的闪电告诉我的</p>
    <p class="green" id="green2">我将告诉每一个人</p>
  </div>
  <br>
  <div class="para3" id="para3">
    <p class="cyan" id="cyan1">给每一条河每一座山取一个温暖的名字</p>
    <p class="cyan" id="cyan2">陌生人,我也为你祝福</p>
    <p class="blue" id="blue1">愿你有一个灿烂的前程</p>
    <p class="blue" id="blue2">愿你有情人终成眷属</p>
    <p class="purple" id="purple1">愿你在尘世获得幸福</p>
    <p class="purple" id="purple2">我只愿面朝大海,春暖花开</p>
  </div>
</div>
<a href="#para1">第一段</a>
<a href="#para2">第二段</a>
<a href="#para3">第三段</a>
|
1
2
3
4
5
6
7
8
9
| #para1:target{
font-weight: bolder;
}
#para2:target{
font-weight: bolder;
}
#para3:target{
font-weight: bolder;
}
|
效果如下:

伪元素选择器
伪元素选择符可以根据元素中特殊位置选择元素。
结构伪类选择器
结构伪类根据元素所处的位置选择元素,通常用于序列型的元素,如列表。
选择列表的第一个元素
格式:
e:first-child(e为列表元素)
示例:选择列表的第一个元素,将其文本样式修改为红色
1
2
3
4
5
6
7
8
9
10
| <h1>结构伪类选择器</h1>
<ol>
<li>第一项</li>
<li>第二项</li>
<li>第三项</li>
<li>第四项</li>
<li>第五项</li>
<li>第六项</li>
</ol>
|
1
2
3
| li:first-child{
color: red;
}
|
效果如下:

选择列表的最后一个元素
格式:
e:last-child(e为列表元素)
示例:选择列表的最后一个元素,将其文本样式修改为绿色、加粗
1
2
3
4
5
6
7
8
9
10
| <h1>结构伪类选择器</h1>
<ol>
<li>第一项</li>
<li>第二项</li>
<li>第三项</li>
<li>第四项</li>
<li>第五项</li>
<li>第六项</li>
</ol>
|
1
2
3
4
| li:last-child{
color: green;
font-weight: bolder;
}
|
效果如下:

选择列表的指定位置元素
格式:
e:nth-child(n)(e为列表元素,n为数字,即指定的列表项)
示例:选择列表的第四项元素,将其文本样式修改为蓝色、加粗
1
2
3
4
5
6
7
8
9
10
| <h1>结构伪类选择器</h1>
<ol>
<li>第一项</li>
<li>第二项</li>
<li>第三项</li>
<li>第四项</li>
<li>第五项</li>
<li>第六项</li>
</ol>
|
1
2
3
4
| li:nth-child(4){
color: deepskyblue;
font-weight: bolder;
}
|
效果如下:

伪元素选择器
伪元素是指元素当中的某一个位置。伪元素选择器可以选择一个位置的元素或者是位置的相对空间
可以选择元素的第一个字符
格式:
e::first-letter(e为列表元素)
示例:选择每一行的第一个字,将其样式增大、加粗
1
2
3
4
5
6
7
8
9
10
11
12
13
14
15
16
17
18
19
20
21
22
23
24
25
26
27
28
| <div>
<h2 class="title" id="title" title>面朝大海,春暖花开</h2>

  <p class="author" id="author">海子</p>

  <div class="para1" id="para1">
    <p class="red" id="red1">从明天起,做一个幸福的人</p>
    <p class="red" id="red2">喂马,劈柴,周游世界</p>
    <p class="orange" id="orange1">从明天起,关心粮食和蔬菜</p>
    <p class="orange" id="orange2">我有一所房子,面朝大海,春暖花开</p>
  </div>
  <br>
  <div class="para2" id="para2">
    <p class="yellow" id="yellow1">从明天起,和每一个亲人通信</p>
    <p class="yellow" id="yellow2">告诉他们我的幸福</p>
    <p class="green" id="green1">那幸福的闪电告诉我的</p>
    <p class="green" id="green2">我将告诉每一个人</p>
  </div>
  <br>
  <div class="para3" id="para3">
    <p class="cyan" id="cyan1">给每一条河每一座山取一个温暖的名字</p>
    <p class="cyan" id="cyan2">陌生人,我也为你祝福</p>
    <p class="blue" id="blue1">愿你有一个灿烂的前程</p>
    <p class="blue" id="blue2">愿你有情人终成眷属</p>
    <p class="purple" id="purple1">愿你在尘世获得幸福</p>
    <p class="purple" id="purple2">我只愿面朝大海,春暖花开</p>
  </div>
</div>
|
1
2
3
4
| p::first-letter{
font-size: 18px;
font-weight: bolder;
}
|
效果如下:

选择元素的首行
格式:
e::first-line(e为列表元素)
示例:选择首行文字,将其样式设置为红色、斜体
1
2
3
4
5
6
7
8
| <div>
<h1>CSS(层叠样式表)</h1>
<p>
层叠样式表(英文全称:Cascading Style Sheets)是一种用来表现HTML(标准通用标记语言的一个应用)或<br>
XML(标准通用标记语言的一个子集)等文件样式的计算机语言。CSS不仅可以静态地修饰网页,<br>
还可以配合各种脚本语言动态地对网页各元素进行格式化。
</p>
</div>
|
1
2
3
4
| p::first-line{
color: red;
font-style: italic;
}
|
效果如下:

可以选择元素的前面位置添加特殊内容
格式:
e::before(e为列表元素)
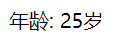
示例:在“25岁”前添加“年龄:”字样
1
2
3
| <div>
<p id="age">25岁</p>
</div>
|
1
2
3
| p#age::before{
content: "年龄: ";
}
|
效果如下:
可以选择元素的后面位置添加特殊内容
格式:
e::after(e为列表元素)
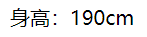
示例:在“身高:”后添加内容
1
2
3
| <div>
<p id="height">身高:</p>
</div>
|
1
2
3
| p#height::after{
content: "190cm";
}
|
效果如下:
后记
结束
(也许会再补充…)